Tuesday, March 25, 2014
Packt Publishing celebrates their 2000th title with an exclusive offer - We've got IT covered!
Monday, February 17, 2014
SQL Server : Rules of Database Normalization (Poster)
"Many years ago, there was a magazine named Database Programming & Design which published a poster on Normalization by Marc Rettig as a subscription renewal premium. It was so popular that it is still around after all this time. It follows one example, the Daisy Hill Puppy Farm database."
Hope, this poster may help new SQL folks to understand the normalization. :)
Tuesday, December 10, 2013
SSRS : I have officially reviewed SQL Server 2012 Reporting Services Blueprints book for Packt Publishing
Folks, I have good news for you all !
I have opted some time out of my busy schedule for officially reviewing the book on SQL Server 2012 Reporting Services Blueprints with Packt Publishing which was published on 28th Oct 2013.
This book does not require readers to have advance knowledge of T-SQL, but the readers are expected to know how to write basic aggregates in T-SQL. SQL Server Reporting Services architecture and any pertinent information are not included in this book. Knowing how data sources and datasets work in advance will greatly help you to progress through the tutorials quickly. This book is perfect for those new to SQL Server Reporting Services. Other SQL Server users, such as database administrators, who are getting involved in report development can greatly benefit from the fast-paced style of this tutorial book.
I would request you all to read this book and provide your valuable feedback. :)
Tuesday, September 10, 2013
SSIS : SSIS toolbox is not visible in SQL Server Data Tools (SSDT)
So, how to get the SSIS toolbox in SSDT? There are two ways to get the toolbox, one is by clicking on the icon as shown below or selecting the menu from View -> Other Windows -> SSIS Toolbox
Hope you got the SSIS toolbox in SSDT J
Friday, May 18, 2012
SQL Server : Find out Nth highest salary of employee using RANK() or DENSE_RANK() functions in SQL Server
(
[EmpCode] INT IDENTITY (1,1),
[EmpName] VARCHAR(100) NOT NULL,
[Salary] NUMERIC(10,2) NOT NULL,
[DeptName] VARCHAR(100) NOT NULL
)
GO
[EmpCode],[EmpName],[Salary]
FROM
[DBO].[Employee] WITH (NOLOCK)
GO
[EmpCode],[EmpName],[Salary]
FROM
[DBO].[Employee] WITH (NOLOCK)
ORDER BY
[Salary] DESC
GO
[EmpCode],[EmpName],[Salary]
FROM
[EmpCode],[EmpName],[Salary]
,RANK() OVER (ORDER BY [Salary] DESC) AS [Highest]
FROM
[DBO].[Employee] WITH (NOLOCK)
) AS High
WHERE
[Highest] = 4
GO
Yeap, this is what we expected right. J
[EmpCode],[EmpName],[Salary]
FROM
[DBO].[Employee] WITH (NOLOCK)
GO
[EmpCode],[EmpName],[Salary]
FROM
[EmpCode],[EmpName],[Salary]
,RANK() OVER (ORDER BY [Salary] DESC) AS [Highest]
FROM
[DBO].[Employee] WITH (NOLOCK)
) AS High
WHERE
[Highest] = 4
GO
[EmpCode],[EmpName],[Salary],[Highest]
FROM
(
SELECT
[EmpCode],[EmpName],[Salary]
,RANK() OVER (ORDER BY [Salary] DESC) AS [Highest]
FROM
[DBO].[Employee] WITH (NOLOCK)
) AS High
GO
[EmpCode],[EmpName],[Salary],[Highest]
FROM
(
SELECT
[EmpCode],[EmpName],[Salary]
, DENSE_RANK() OVER (ORDER BY [Salary] DESC) AS [Highest]
FROM
[DBO].[Employee] WITH (NOLOCK)
) AS High
GO
[EmpCode],[EmpName],[Salary]
FROM
[EmpCode],[EmpName],[Salary]
, DENSE_RANK() OVER (ORDER BY [Salary] DESC) AS [Highest]
FROM
[DBO].[Employee] WITH (NOLOCK)
) AS High
WHERE
[Highest] = 4
GO
[EmpCode],[EmpName],[Salary]
FROM
(
SELECT
[EmpCode],[EmpName],[Salary]
, DENSE_RANK() OVER (ORDER BY [Salary] DESC) AS [Highest]
FROM
[DBO].[Employee] WITH (NOLOCK)
) AS High
WHERE
[Highest] = @iHightest
GO
SET @iHightest = 2
SELECT
[EmpCode],[EmpName],[Salary],[DeptName]
FROM
(
SELECT
[EmpCode],[EmpName],[Salary],[DeptName]
, DENSE_RANK() OVER (PARTITION BY [DeptName] ORDER BY [Salary] DESC) AS [Highest]
FROM
[DBO].[Employee] WITH (NOLOCK)
) AS High
WHERE
[Highest] = @iHightest
ORDER BY
GO
- RANK()or DENSE_RANK()will work in SQL Server 2005 and above versions.
- For more info refer http://msdn.microsoft.com/en-us/library/ms173825
Tuesday, May 8, 2012
SSIS : Step by step process of creating a deployment Manifest file
It may be a simple process to create a deployment manifest file in SSIS for experienced guys, but may be difficult for those who are new to SSIS. So, this article will walk you through the steps to create a manifest file, in other words, deployment utility in SSIS.
Before we start discussion, let me tell you what is manifest file in SSIS. :)
Once we complete the development of the package, the next step would be deploying the package in different machine / server. The deployment utility which contains the files you need to deploy like packages, configuration files, Readme file (which might be placed in Miscellaneous folder) etc., These files are included automatically in the deployment utility when we built the package.
Now, Its time to create a manifest file in SSIS. :)
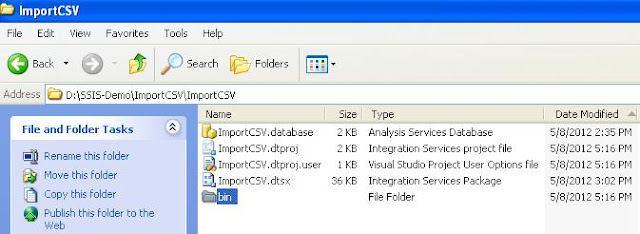
For this example, I have already created one sample package and the package folder will contains the following files before you build a solution or package.
When you build a package as shown below :
After you built the package, you could see one extra folder is created in the name of “bin” inside the package folder which will contain the deployment utility once we create it.
By default, the output path would be “bin”, but this folder name can be changed by selecting the project and right click properties as below :
Just open the bin folder and check, you could see only ImportCSV.dtsx file.
As I said before, its very easy process to create a deployment manifest file which I am going to show now :
Select your project and right click -> Go to Properties -> Deployment Utility and make CreateDeploymentUtility as "True" which is by default “False”.
The deployment utility path can be changed in DeploymentOutputPath as when required. :)
Click “OK” button.
Again, Let us go and build / rebuild solution or package.
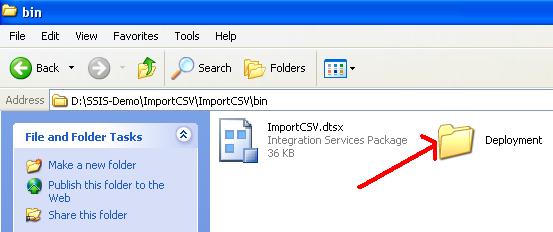
Once you built, just go to “bin” folder and check, you could see a new folder as “Deployment”.
Open the folder and could see the manifest file has been created in the name of “ImportCSV.SSISDeploymentManifest” which will be used to send for deployment in other machines / servers.
Let us test, how it works? Double click the manifest file and follow the steps as below :
Press “Next” button.
You can deploy the package either in “File System” or “SQL Server” deployment. For this demo, let us go with default option i.e “File System” deployment. Press "Next" button.
Change the folder location, if you want, otherwise press “Next” button.
Press “Next” button.
Here, you can see the installation details and click “Finish” button to complete the deployment.
In this example, I have not included any configuration or miscellaneous files, so you could see only “ImportCSV.dtsx” file in the deployed folder.
Keep reading this page for XML configuration and adding miscellaneous files in the SSIS package.
Hope, you have enjoyed by reading this article and your comments on this article would be highly appreciated.:)
Note :
- Please keep in mind that you cannot deploy a single package, if you have multiple packages in the project. In this case all the packages will be deployed.
- For further info, please refer Books Online.
Monday, March 19, 2012
SQL Server : Step by step installation guide for SQL Server 2012 (Denali)
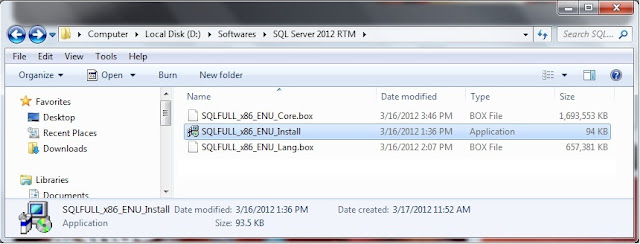
As my laptop is 32-bit system, so I have downloaded the following files from the above link. Likewise, you can download the files for 64-bit system(x64) too. :) Finally, check your system requirements from the same link.
ENU\x86\SQLFULL_x86_ENU_Core.box
ENU\x86\SQLFULL_x86_ENU_Install.exe
ENU\x86\SQLFULL_x86_ENU_Lang.box
After downloading the above files, your system will look like below:
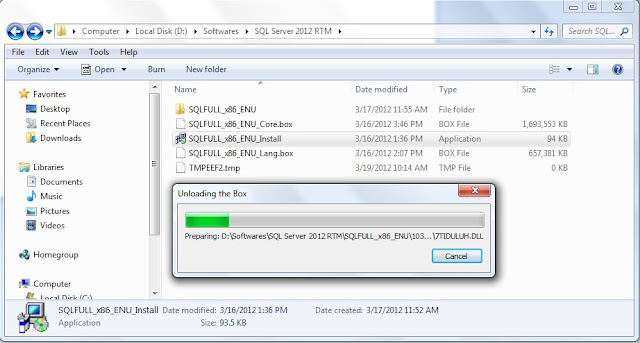
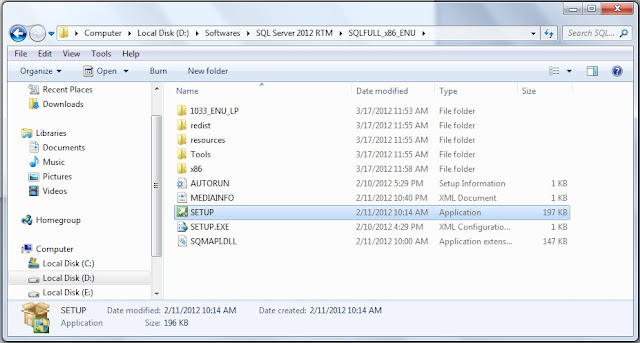
Double click the “SQLFULL_x86_ENU_Install.exe”, it will extract the required files for installation in the “SQLFULL_x86_ENU” folder as shown below:
Click the “SQLFULL_x86_ENU” folder and double click “SETUP” application.
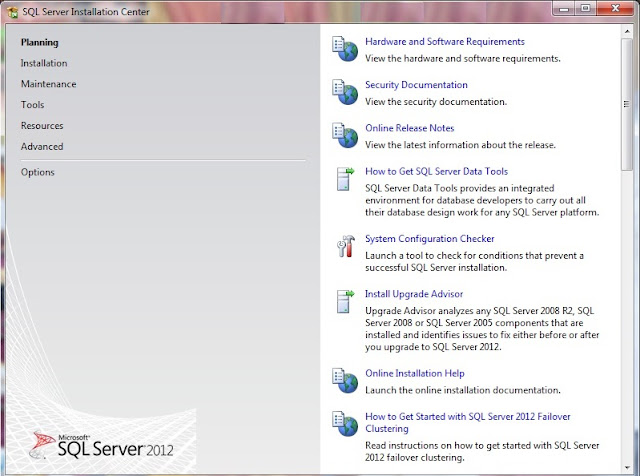
Checking your system requirements for installation.

When you see “SQL Server Installation Center” screen, it means that your system configuration is perfect for “Denali” installation. :)
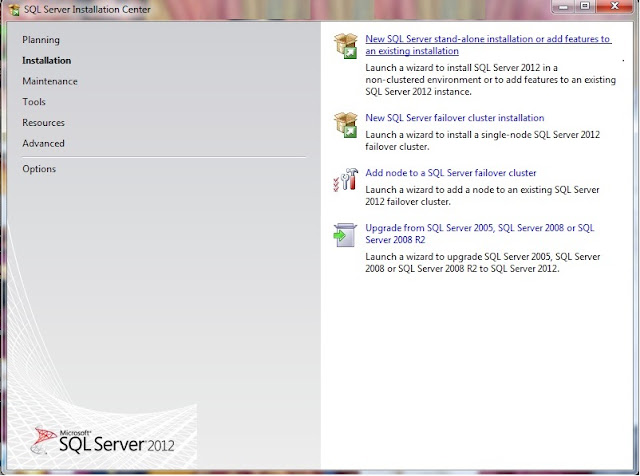
Click installation from the left pane and select “New SQL Server stand-alone installation or add features to an existing installation”.
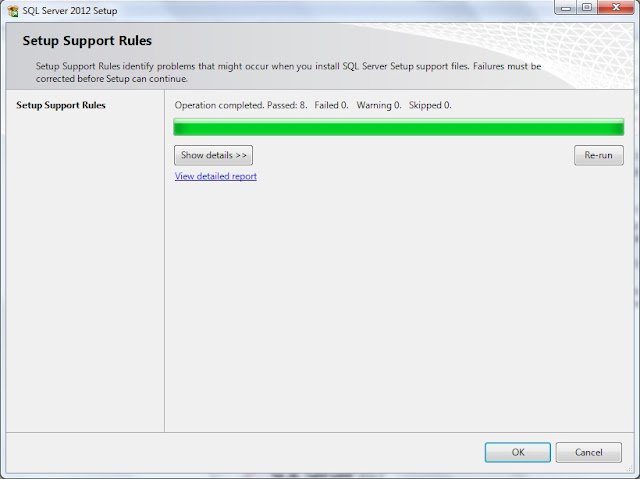
In the “Setup Support Rules” Click "OK" button when you have failed 0. Otherwise fix the issue and click "Re-run" button.
Here, I left default edition “Evaluation”, but you can also choose “Express” edition from the drop down list. (Leave the product key as of now, later you can convert to licensed version at any time, refer the above link.
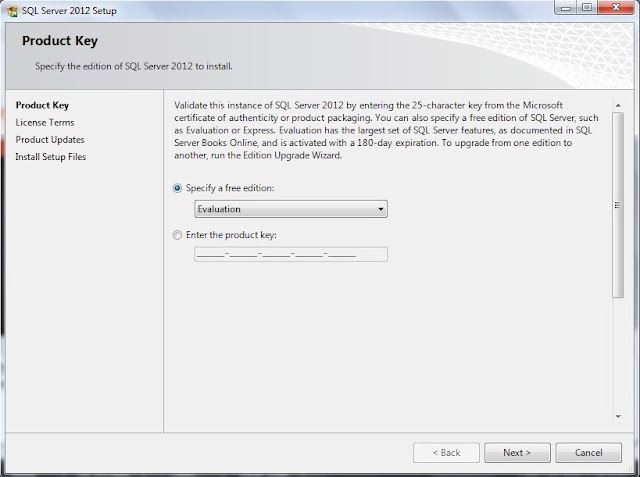
Press “Next” button.
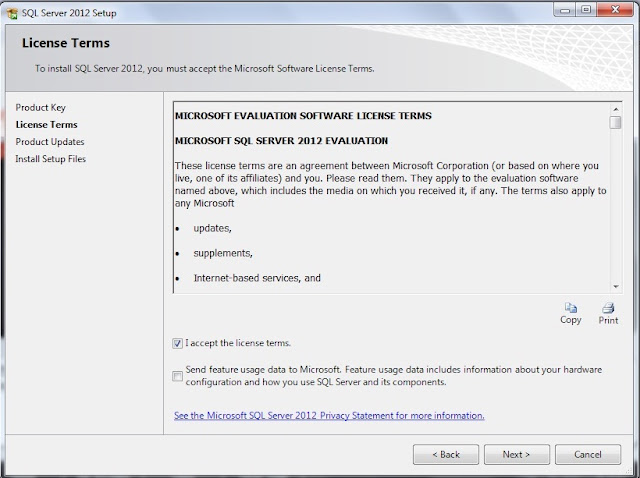
Select the “I accept the license terms” and click “Next” button.
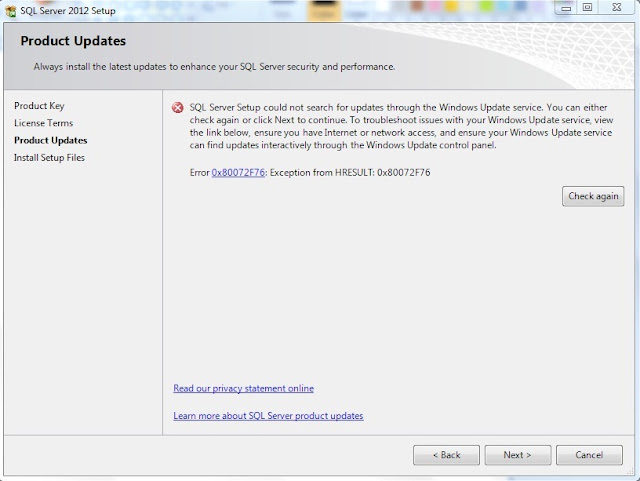
I have installed in “Offline” mode, So I got the above error message otherwise, it does windows update automatically and will continue the process. :)
Press “Next” button.
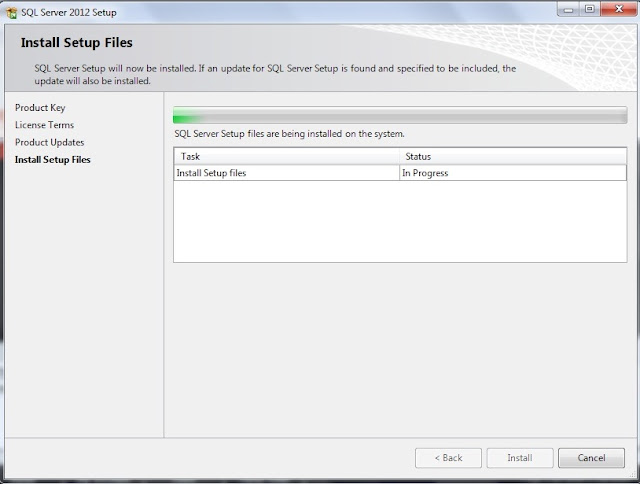
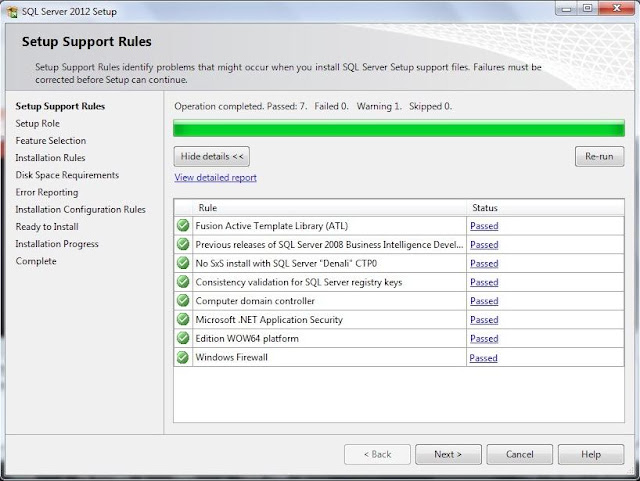
Press “Next” button, if all status are passed. Otherwise fix the issue and press “Next” button.
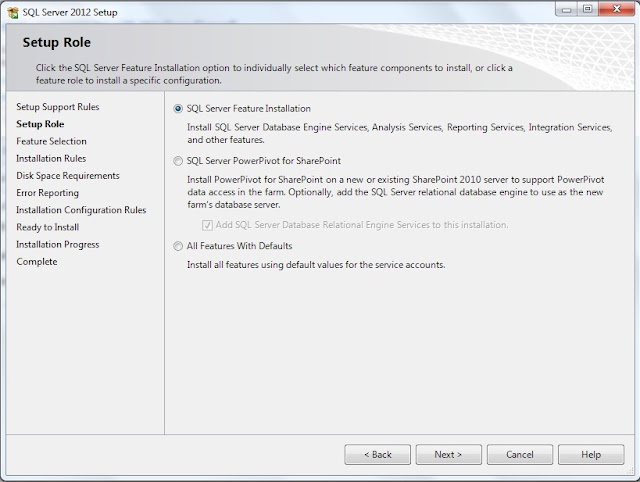
I left the default feature “SQL Server Feature Installation”, if you do not want to change the option then press “Next” button.
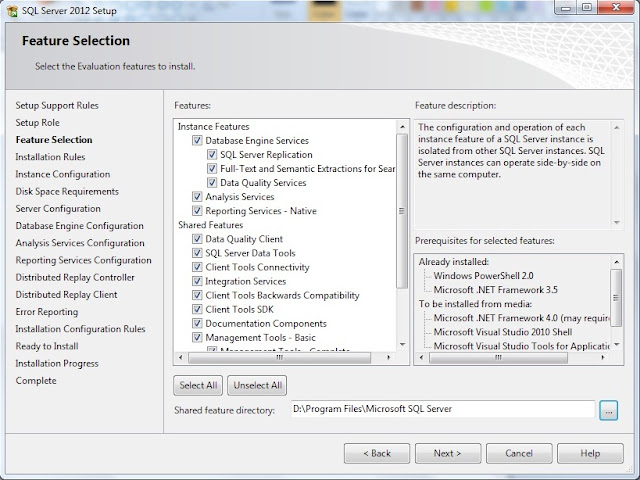
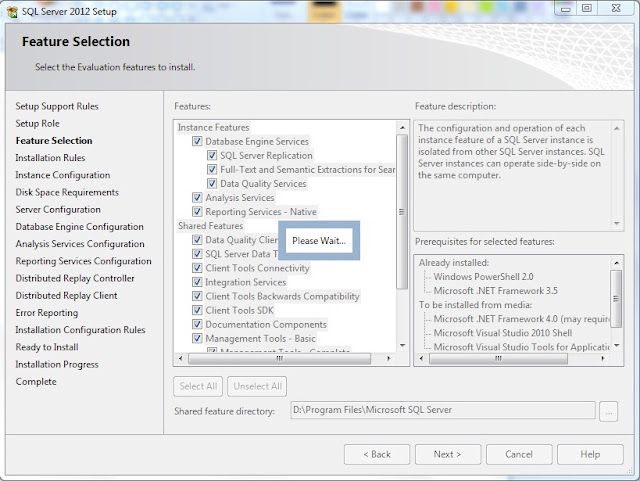
Select the features and change the “Shared feature directory” if you want, otherwise press “Next” button.
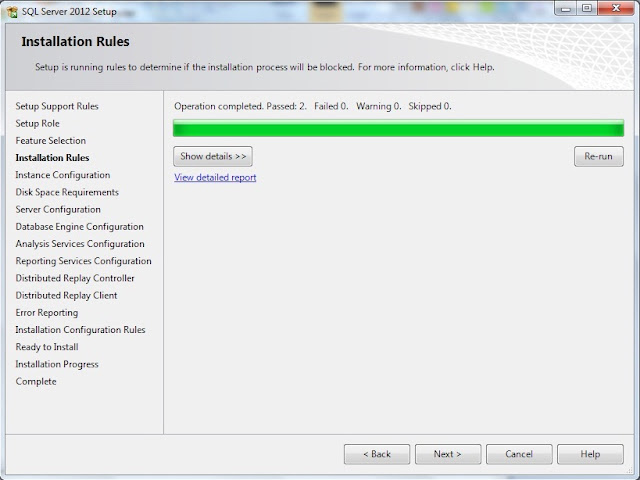
Press “Next” button if failed count is 0.
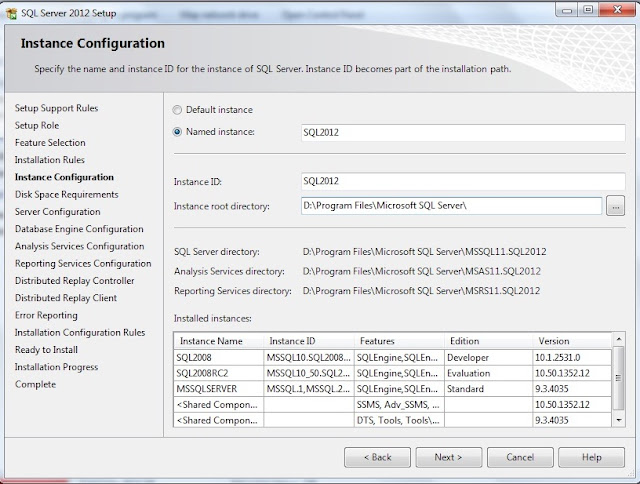
As I have already 2 instances, so I have selected “Named Instance” and given the instance (server) name. You can change “Instance root directory” if you want. Otherwise, press “Next” button.
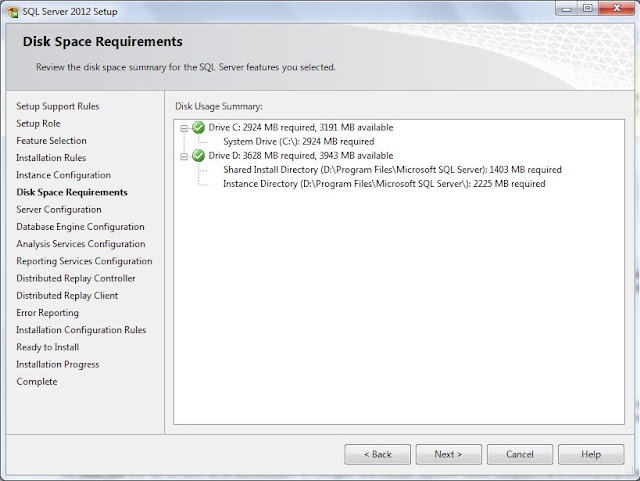
It will not allow, if you do not have sufficient space in the disc. Press “Next” button.
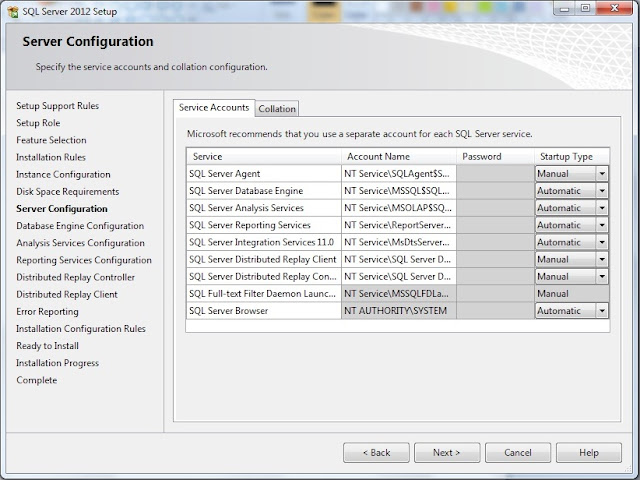
You can change the “Startup Type” for SQL services in the tab. Which also can be done in the Control Panel “Services” after installation.
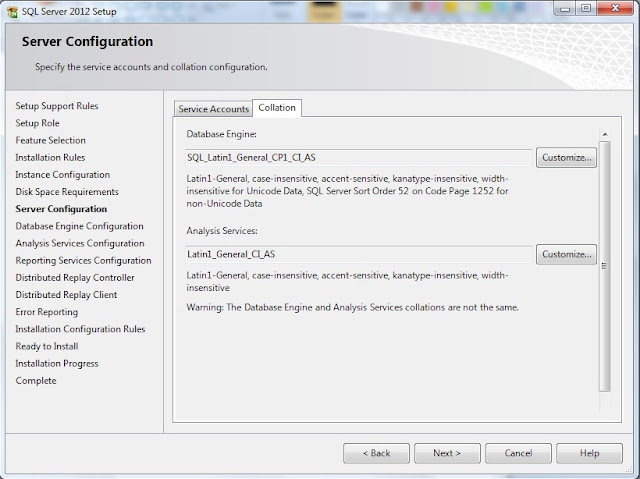
Change the “Collation” if you want, otherwise Press “Next” button.
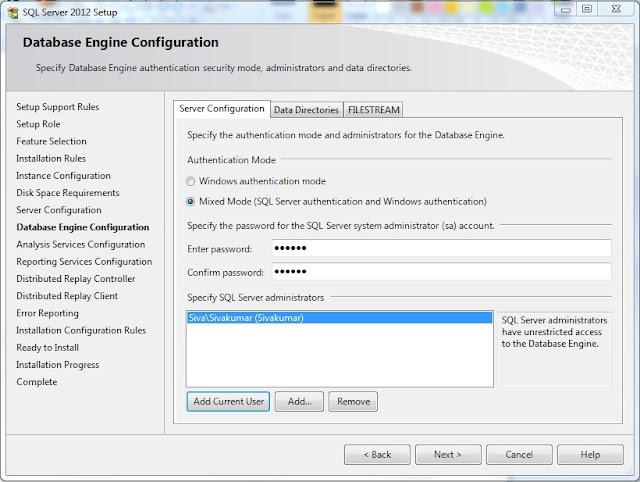
Choose the authentication mode and specify the “Administrator” user. Here, I have selected “Add Current User”. Also, you can change the “Data Directories” and enable “FILESTREAM” if you want , otherwise Press “Next” button.
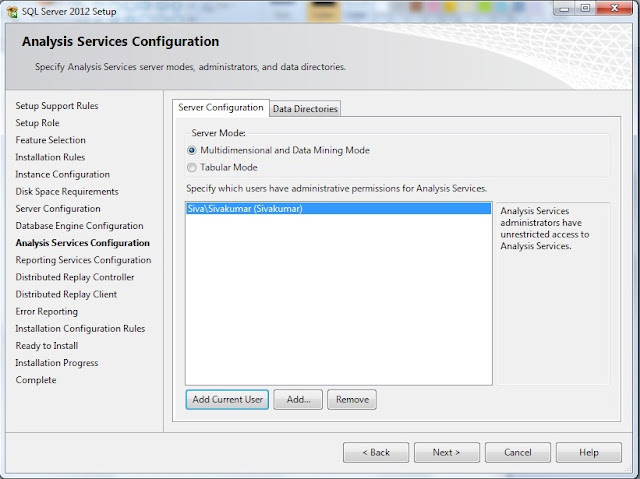
You can change the Analysis Services “Server Mode” and “Administrator” user. Here, I have selected “Add Current User”. Also change the “Data Directories” if you want , otherwise Press “Next” button.
Note : You can select only one server mode to use: “Multidimensional and Data Mining Mode” or “Tabular Mode”. If you want both, you need to run the setup again after the first instance setup. Refer Books online.
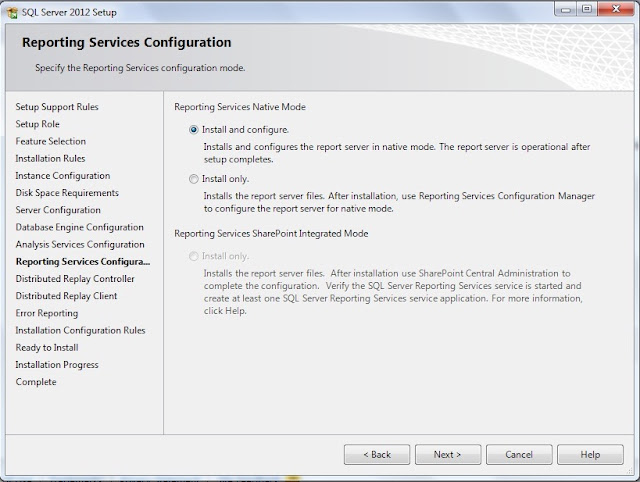
Here, you need to choose “Reporting Services Native Mode” and press “Next” button.
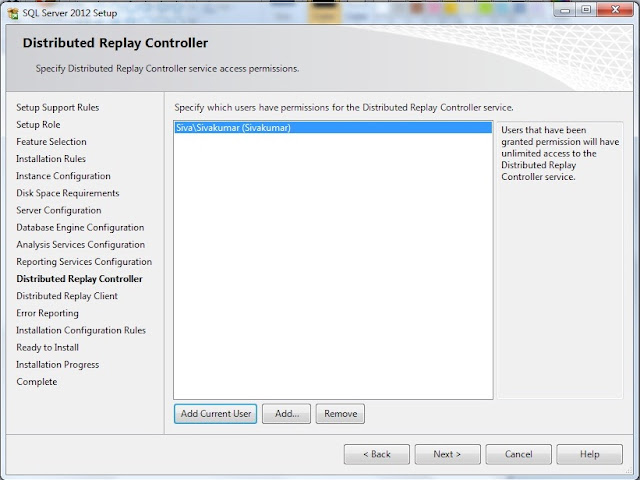
“Distributed Replay Controller” service feature is new in SQL Server 2012, here specify the user who should have permission to use this service. Press “Next” button.
Note : Distributed Replay feature helps you assess the impact of future SQL Server upgrades.
Refer http://msdn.microsoft.com/en-us/library/ff878183(v=sql.110).aspx
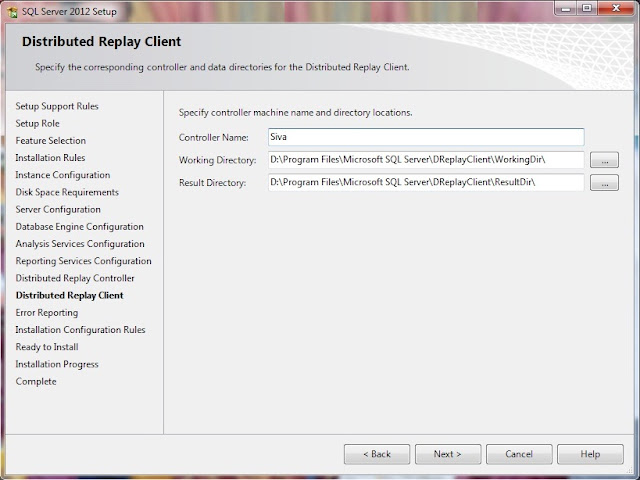
Specify the Controller Machine name which should have “Distributed Replay Controller” service. Also you can change the working directory and Press “Next” button.
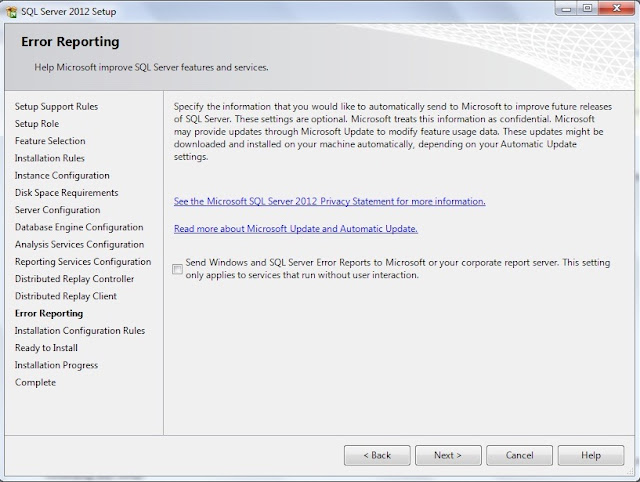
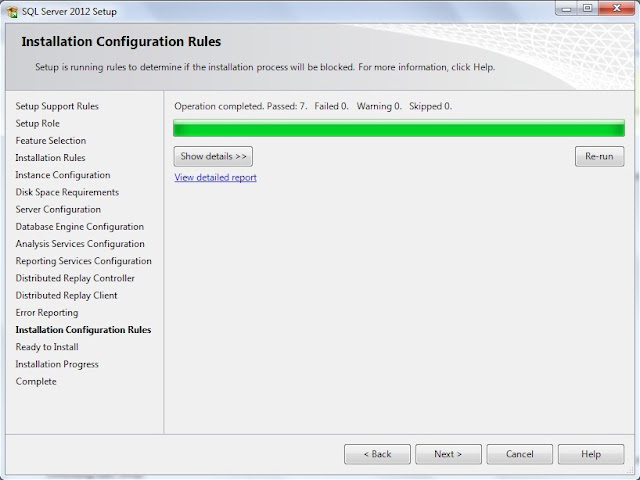
Press “Next” button, if failed count is 0.
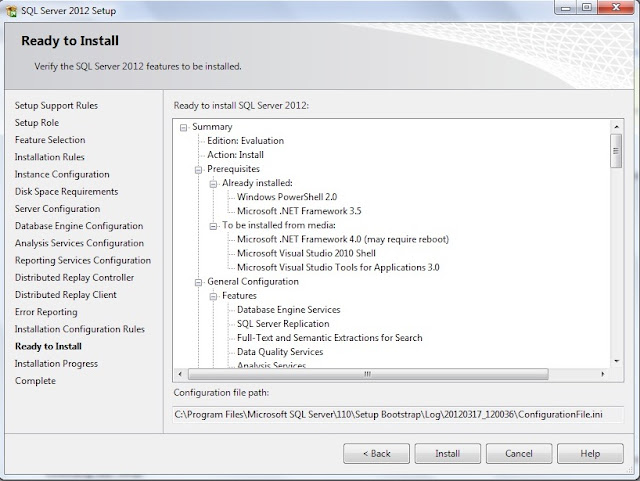
Here, you can find the list of "SQL Server 2012" features which will be installed. If you would have missed to enable any features, click “Back” button and enable. Otherwise press “Install” button to proceed.
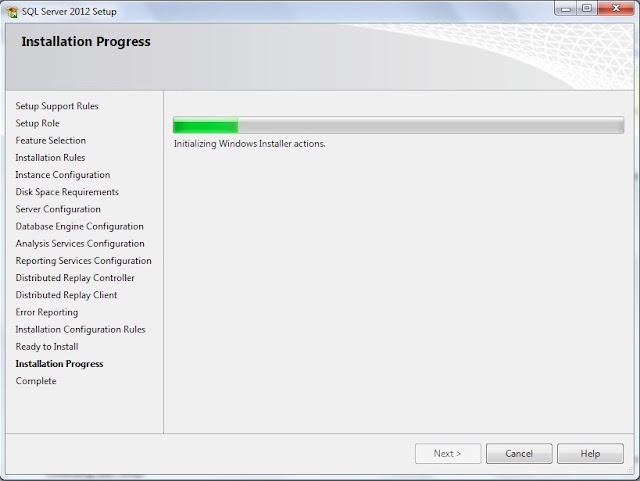
You can see installation progress. Press “Cancel” button, if you want to stop the installation.
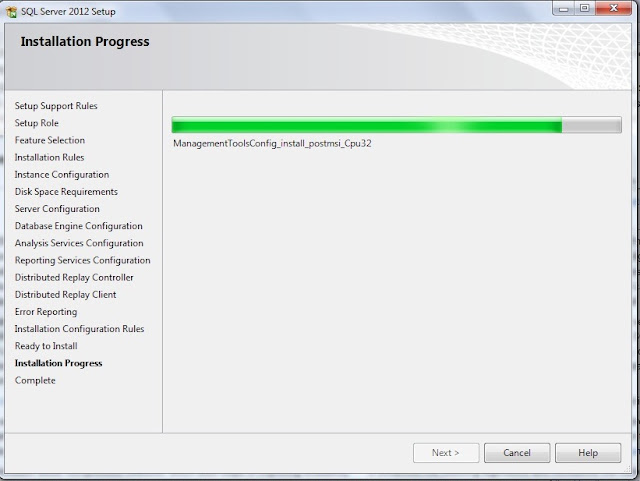
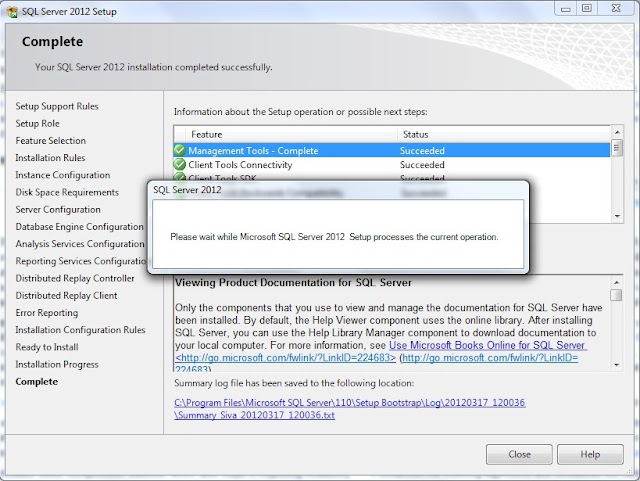
After the successful installation, your screen should look like below :
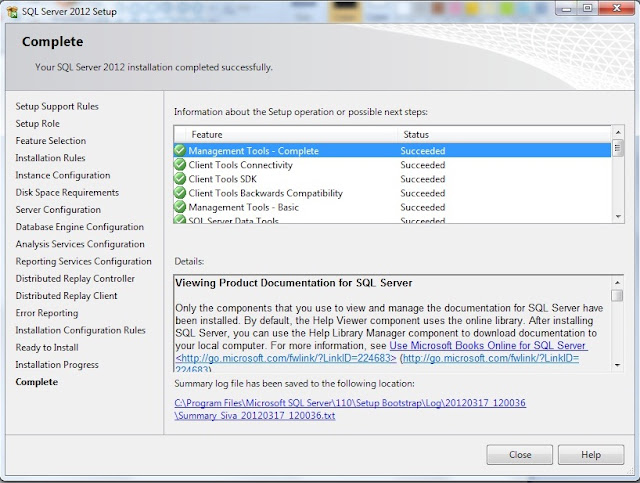
Wow, you have successfully installed SQL Server 2012 and to confirm the successful of installation from the screen, you can find the “Succeeded” for all the features and refer summary log file for further info.
Press “Close” button.
Now, you can play with SQL Server 2012 features.
Go to “SQL Server 2012” menu and click “SSMS”.
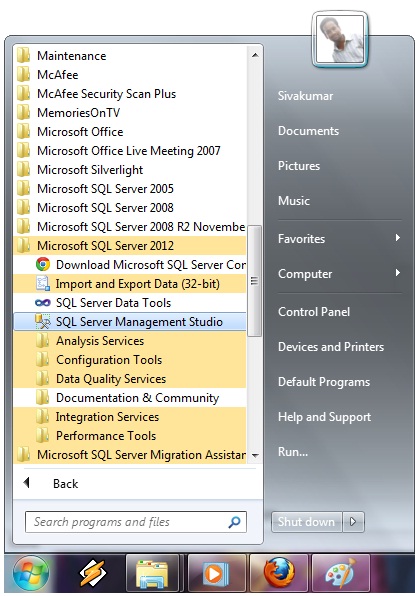
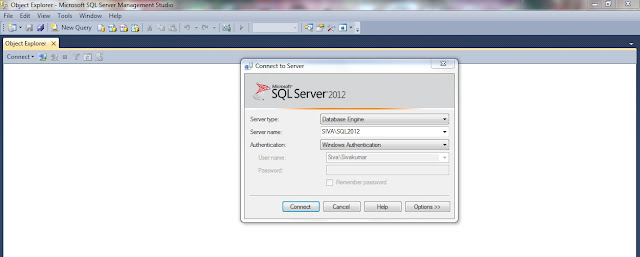
Select appropriate SQL Server 2012 instance and authentication mode and click “Connect” button.
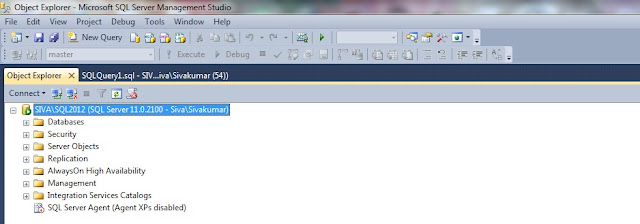
Now, you are in SQL Server 2012 management studio. :)
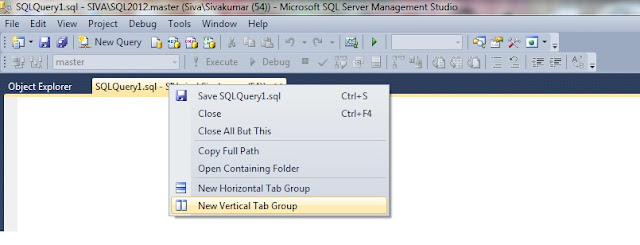
Now, you can right click and change the “New Vertical Tab Group”.
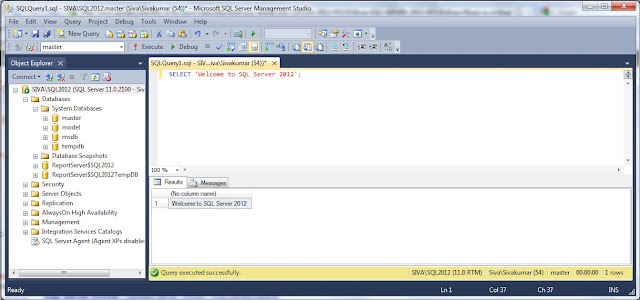
Write your favorite query and execute. All the very best for your learning :)
I hope, this article would have guided you to install SQL Server 2012 ("Denali").


